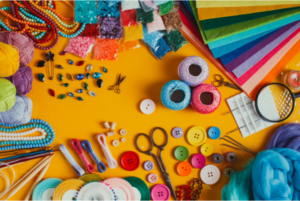
If you’re a crafter like me, then you may keep many different categories of craft supplies. From instructions (patterns, magazines and templates) to tools, large and small, to basic needs (wool, paper, glue), to embellishments (glitter, beads, stickers, wire, and even unusual items like corks). It’s no wonder craft supplies can get out of hand.
Here’s how to declutter your craft supplies…
Start with a frank assessment of what you have, and what you need in the future. I don’t mean evaluating each little item. I mean taking a broad overview. Create a list of all the different locations you have stuff stashed. That will help when it comes to deciding where to start decluttering. Then think about the crafts that still get your blood pumping. Just like clothes and hairstyles, craft has fashions which go in and out of favour. Are you still excited by an afternoon of scrapbooking, beading, knitting, decoupaging, etc.? Once you know the answer to that question, you’ll know what, in broad terms, to keep.
With your vision for what gets to stay, time to put that vision into action. Refer to the list of stash locations you started with. Choose just one – choose one that is easy to access. Pull everything from that one location and begin the cull. For now, just sort into keeping and not keeping. Try not to stumble on the if-I’m-not-keeping-it-where-will-it-go question. Trust me, there are lots of worthy charities, crafty friends or local organisations that will gladly take them off your hands. If they won’t, then maybe it’s trash. The idea is to keep moving, keep making decisions. Next it’s time to put things away again, so they can be found and used when the urge to craft strikes. Resist the temptation to buy pretty or specific storage containers for now. Wait till all your crafts supplies are sorted, culled and categorised. I guarantee that as you go, you will change your mind as you see that you have more of some things, and less of others. Right at the end of the sorting and culling is when you can go out and splurge on the “right” containers or furniture to hold the good stuff you’ve saved.
One tip to help you decide on what stays, create a list of the projects you’d like to complete and put them in priority order. That creates a timeline to work from. By putting it down on paper, you will see that although your intentions are admirable, there is probably not enough time in the world to complete everything you have your heart set on. Time to play favourites.
Don’t be surprised if you get distracted. There’s a reason you’ve collected those pretty fabrics and buttons, papers and punches, wool and … oh my, see how easy it is to get distracted. Keep your goal firmly at the front of your mind.
Be ruthless. Sure, you originally had fabulous plans for all those fabulous goodies, but plans change. The plaid fabric bought for a child’s applique tshirt may no longer be appropriate, especially if that child is now a teen wearing nothing but black.
It helps to use a “staging area”, a wide flat space where you can spread out to work. Ideally this space doesn’t impact on the rest of the home. The kitchen bench is not a good staging area! The dining table or guest bed might be.
Ok, once you’ve worked your way through the stash of supplies, I hope that
• you have much less to store
• you have plans for the things you decided to keep
• you have free space to return the items to
• and you have a desire to use those supplies, just as they’re intended
Now’s the time to consider what storage is appropriate. For ideas, go to my Order in the Craft Room Pinterest board here. The best illustrations have supplies visible and ready for action. Notice also in the images, there is usually a flat space – either desk or table – available for working on, and it’s not piled high with other things. I hope you find lots of inspiration there.


